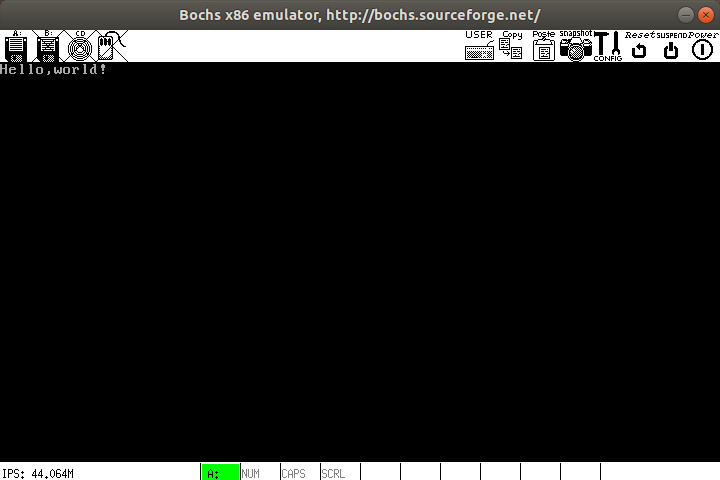
每一个伟大的目标,都是从Hello World开始的
直接见代码:
; boot.asm
org 7c00h

mov ax,cs
mov es,ax		; es=cs
mov ax,50h
mov ss,ax
mov sp,7700h	; ss:sp=0x7c00

call clear		; clear()

mov bp,str_hello_world
mov cx,data_end-str_hello_world
call puts		; puts(str_hello_world,strlen(str_hello_world))

jmp $

clear:	; void clear()
	push dx
	push cx
	push bx
	push ax

	mov ax,0600h
	mov bx,0700h
	xor cx,cx
	mov dh,24
	mov dl,79
	int 10h

	pop ax
	pop bx
	pop cx
	pop dx
	ret

puts:	; void puts(es:bp=str,cx=len)
	push dx
	push bx
	push ax

	mov ax,1301h
	mov bx,0007h
	xor dx,dx
	int 10h

	pop ax
	pop bx
	pop dx
	ret

str_hello_world db "Hello,world!"
data_end:

times 510-($-$$) db 0
dw 0xaa55
运行
相信各位手上已经没有软盘了,频繁开关机也比较麻烦,最重要的是直接机器运行不方便调试。所以我们肯定要使用虚拟机的。
各种虚拟机都可以使用。我本来也准备用VirtualBox的,但我折腾了一晚上的VirtualBox Debug后还是决定用bochs了。
虽然bochs很老、很慢,但它调试很方便啊
所以还是用bochs吧
(当然,如果你会用VirtualBox Debug或其它虚拟机的调试工具的话,你完全不需要这个破旧玩意)
bochs安装与初体验
- Debian系的话直接
sudo apt install bochs-x即可 -
Red Hat系及其它的本人不太清楚,可以试试直接用自带的包管理器下载bochs-x或bochs,而且确保其有调试功能
没有的话可能需要去网上下载:
- bochs sourceforge下载
- 网站下载(仅tar.gz文件)
安装完后,我们还需要一个bochsrc文件(配置文件),放在img文件所在目录
###############################################################
# Configuration file for Bochs
###############################################################

# how much memory the emulated machine will have
# 单位MB,可以自己调整(但似乎到了512MB以上就会出锅)
megs: 16

# filename of ROM images
# 这两项是需要自己find一下文件位置的,似乎不同电脑并不一样
romimage: file=/usr/local/share/bochs/BIOS-bochs-latest
vgaromimage: file=/usr/local/share/bochs/VGABIOS-lgpl-latest

# what disk images will be used
floppya: 1_44=a.img, status=inserted

# choose the boot disk.
boot: floppy

# where do we send log messages?
log: bochs.log

# disable the mouse
mouse: enabled=0

# enable key mapping, using US layout as default.
# 这个我暂时不知道怎么用,但我们一开始反正用不到键盘
# keyboard: enabled=1, map=/usr/share/bochs/keymaps/x11-pc-us.map
然后编译代码生成a.img:
nasm boot.asm -o boot.bin
dd if=/dev/zero of=a.img bs=1474560 count=1 conv=notrunc
dd if=boot.bin of=a.img bs=512 count=1 conv=notrunc
当然你也可以写一个makefile
然后bochs -q
控制台输出:
========================================================================
                       Bochs x86 Emulator 2.6.9
               Built from SVN snapshot on April 9, 2017
                  Compiled on Oct  4 2019 at 20:44:42
========================================================================
00000000000i[      ] BXSHARE not set. using compile time default '/usr/local/share/bochs'
00000000000i[      ] reading configuration from bochsrc
00000000000i[      ] installing x module as the Bochs GUI
00000000000i[      ] using log file bochs.log
Next at t=0
(0) [0x0000fffffff0] f000:fff0 (unk. ctxt): jmpf 0xf000:e05b          ; ea5be000f0
<bochs:1>
bochs窗口:

输入C+Enter:

代码解释
- 第二行
org 7c00h,大致应该可以猜到,程序是会被移至内存cs:7c00h处执行(事实上就是0:7c00h) - 6-8行:
 mov ax,50h
 mov ss,ax
 mov sp,7700h	; ss:sp=0x7c00
栈段为0500h-7c00h,因为0-04ffh是中断表和BIOS,7c00h-7dffh是我们的boot
- 18-49行, clear和puts函数中的
int 10hax=0600h or 0700h: 清屏- bx: 每一格的内容(bh属性,bl字符)
- ch, cl: 左上角行列
- dh, dl: 右下角的行列
ax=1300h or 1301h: 输出字符串且属性由bl提供- al: 光标位置是否随之改变
- 0: 不变
- 1: 变
- bh: 页码
- bl: 属性
- cx: 字符串长度
- dh, dl: 行列坐标
- es:bp: 字符串地址
- al: 光标位置是否随之改变
- 54-55行:
 times 510-($-$$) db 0
 dw 0xaa55
因为boot是存在软盘的0扇区(引导扇区),大小为512字节
当启动时boot轮到软盘时,计算机会查看引导扇区最后2字节是否为0xaa55——如果是,则说明这是一个可以boot的引导扇区,否则将跳过软盘进入下一项boot
而代码中$表示当前语句的地址,\(表示这一个section(没有section则为程序开头)的地址,$-\)自然就表示当前语句到section(或程序)开头的长度。故
times 510-($-$$) db 0就是用0补齐至510字节。
故关于软盘boot我们总结为如下:
- 一般计算机会有多个boot项,前面的均不是可boot内容,轮到软盘
- 检查引导扇区的最后两字节是不是aa55h
- 若是,则将引导扇区复制到7c00h-7dffh,并
jmp 0:7c00h - 否则检查下一个boot项
- 若是,则将引导扇区复制到7c00h-7dffh,并
知道软盘boot的原理后,我们就要开始为我们的操作系统写boot了